Using an Integrated Development Environment
In this reading, we will explore a special kind of code editor called an integrated development environment (IDE). Like other writers, programmers often have domain-specific tasks that they want to perform with their text. For example, a person writing a novel will likely want to run a spell-checking tool; novelists therefore often use professional-grade writing software like Microsoft Word. Likewise, programmers usually want to run code-checking tools, and IDEs come packaged with such features.
However, an IDE goes well beyond mere text editing and checking. Unlike Microsoft Word, many IDEs feature sophisticated code checking tools that can help you pinpoint potentially problematic code–even if that code compiles correctly and runs fine most of the time. This is akin to Microsoft Word being able to tell you not just that your spelling or grammar has problems, but that your very story has plot holes!
One feature in particular will be emphasized here: the breakpoint debugger. Once you know how to use a breakpoint debugger, you should rarely need to employ System.out.println for debugging (aka “printf debugging”) anymore. Debugging features like this will make you a better, more efficient programmer.
We will explore one such IDE, called IntelliJ IDEA, in this tutorial. Note that there are many good, free IDEs, and this tutorial should not be interpreted as being a testimonial for IDEA. I’ve primarily chosen IDEA because it is a well-maintained free IDE that I have used for many years and with which I am very familiar. After you’ve read this tutorial and tried out IDEA’s features, you should feel free to explore whatever option best suits your fancy (even if that is just to stick with emacs!). In fact, IDEA is not my favorite IDE, although I do think that it is a very good one.
Installing IntelliJ IDEA
If you are working on any of the Mac lab machines here in the CS department, we have pre-installed IntelliJ IDEA for you. However, if you are working at home, you will need to install it yourself. First, follow this link to download IntelliJ IDEA.
Note that the page linked to above should have installation instructions for your platform. IDEA runs on the macOS, Windows, and Linux (and even FreeBSD with a little more effort).
Supported languages
Note that one reason that we use IntelliJ IDEA here is because of its built-in support for the Java programming language. However, IDEA is a versatile IDE that also works with other programming languages. For example, the free version of IDEA is widely used for the Scala and Kotlin programming languages. See the IDEA documentation if you are interested.
Projects
The first thing to note is that IDEA has a built-in unit of code organization called a “project.” Other editors you may have used, like emacs or vi, have no such built-in notion, at least not by default. This means that when you start working on a codebase, you need to tell IDEA which of your files belong to your “project.”
There are two ways to tell IDEA about your project: either 1. use IDEA from the very beginning to create your project, or 2. import your project. This tutorial will explore creating a new project, since that’s the easiest way to explain how it works. For importing a project from Github, see the link at the end of this document.
Creating a new Java project
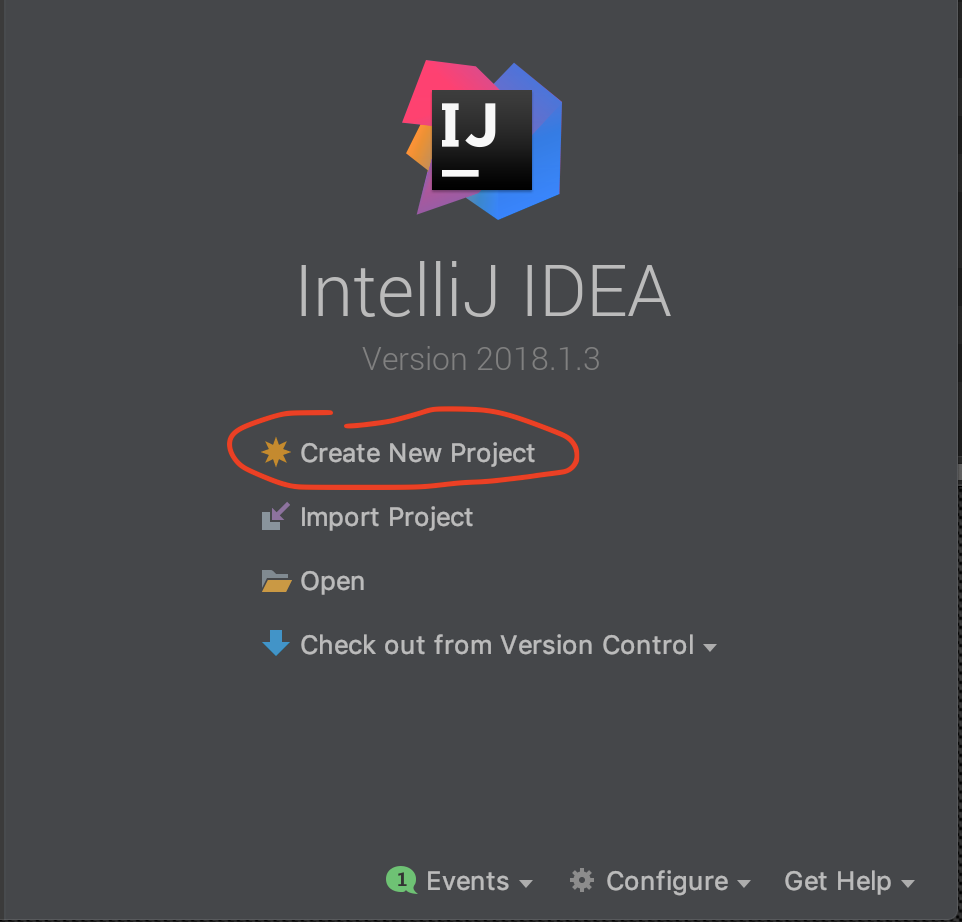
Start IDEA. Once it is started, click on the “Create New Project” button.
You will be asked to select the kind of project. Choose “Java”. Note that you may see different options than what I have here.
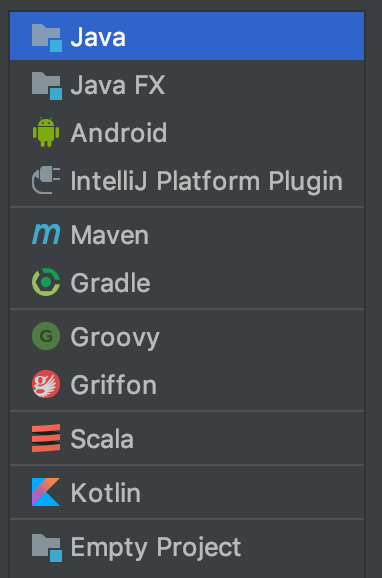
Do not check any of the “Additional Libraries and Frameworks.”
If this is the first time you are running IDEA, you will likely need to choose which version of the Java development kit you want IDEA to use. Look for the “Project SDK” section. If you see a version of Java listed like in the image below, IDEA chose one automatically for you.

Otherwise, you will need to set up a new SDK. Skip this step if you already have an SDK. First, click the “New…” button. Second, navigate to your Java installation’s “Java home.” Finally, click “Open.”
The path to your Java home varies by operating system and by Java version; you can usually find out where it is by Googling. Here are some common Java homes for Java version 9:
- macOS:
/Library/Java/JavaVirtualMachines/jdk-9.jdk/Contents/Home - Windows:
C:\Program Files\Java\jdk-9 - Linux (Ubuntu):
/usr/lib/jvm/java-9-openjdk-amd64
Once you have selected “Java,” made sure not to select any additional libraries, and you have an SDK set up, click “Next.”
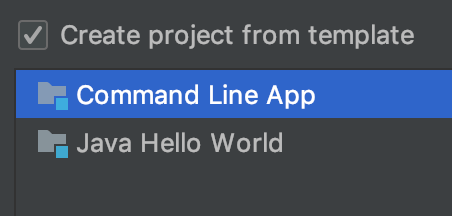
You will be asked whether you want to create a project from a template. Let’s choose the “Command Line App” template so we can see how IntelliJ organizes our code.
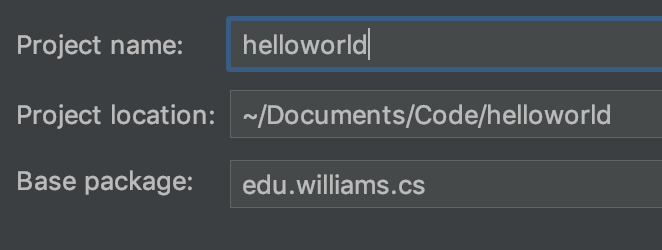
You will be asked for a project name, location, and “base package.”
- The
Project nameis the name for your project. Put in whatever you want. E.g., “lab8.” I recommend writing the name in lowercase with no spaces. - The
Project locationspecifies where IntelliJ will put the project on your disk. - The
Base packageis a “Java namespace” for your project. For now, you should putedu.williams.cshere.
Finally, click “Finish.”
Understanding your project
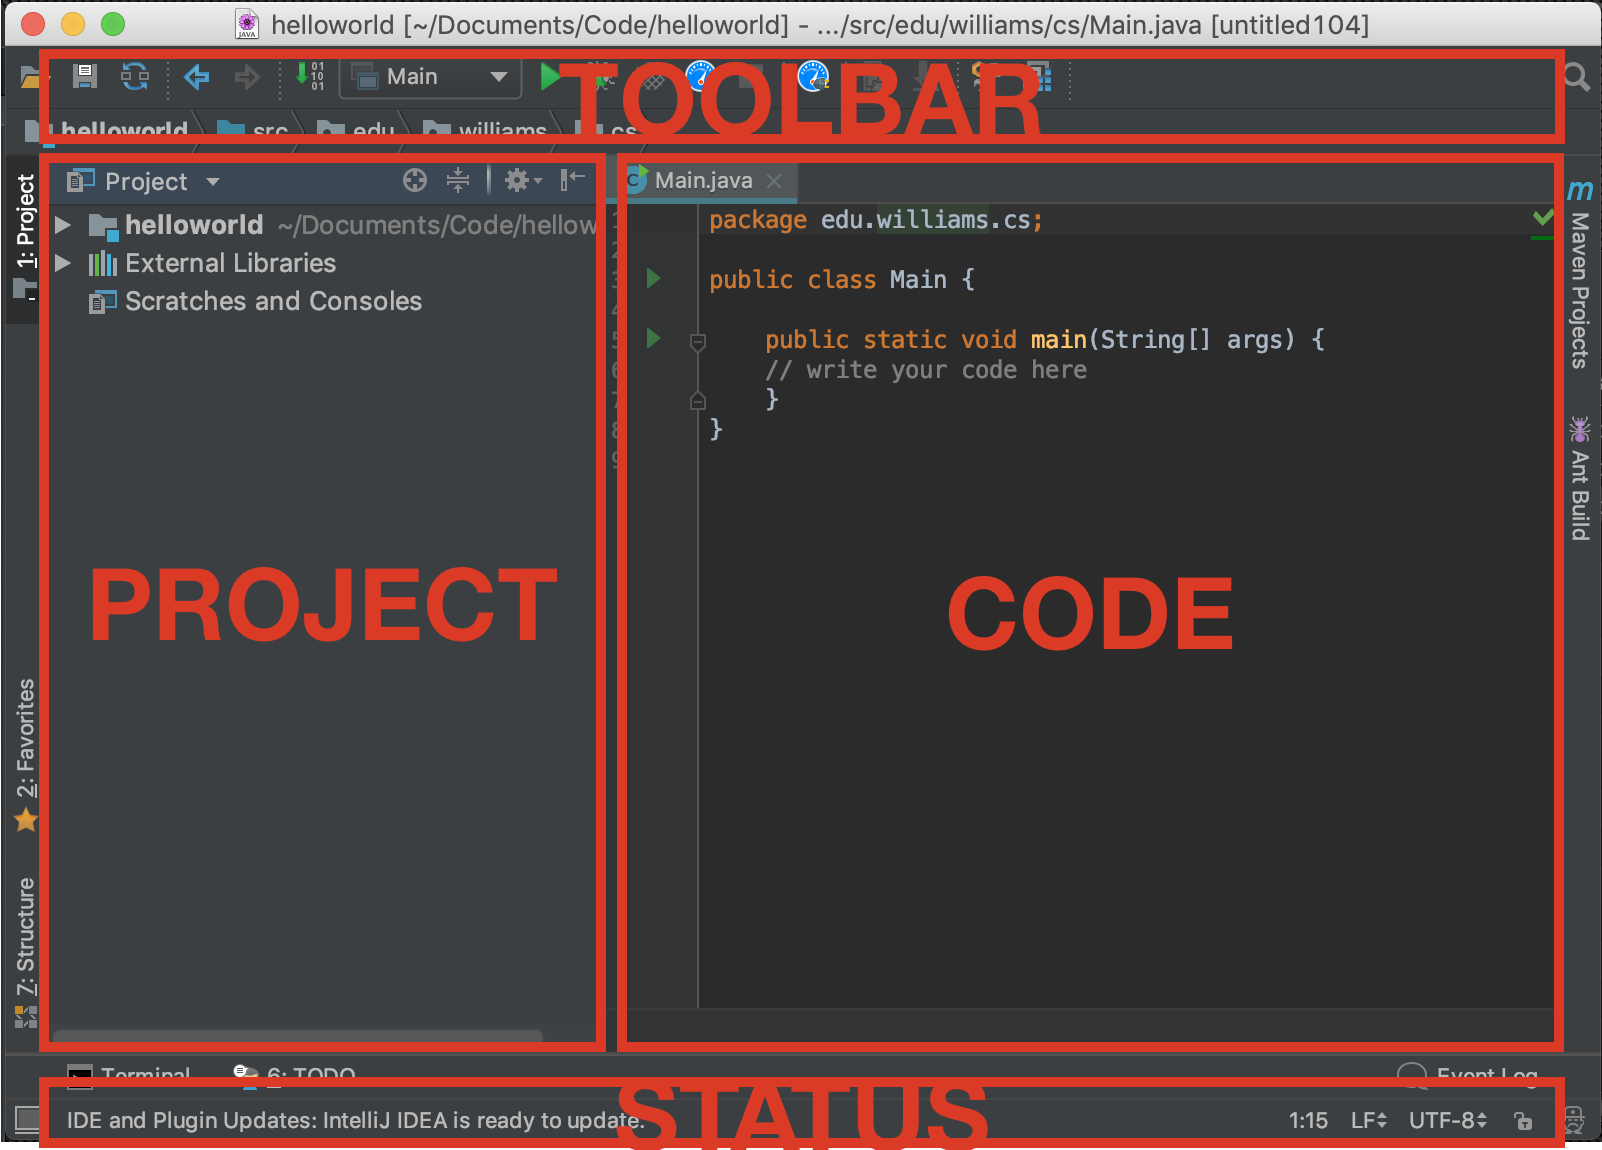
The first thing you will see is a window that looks a bit like this:
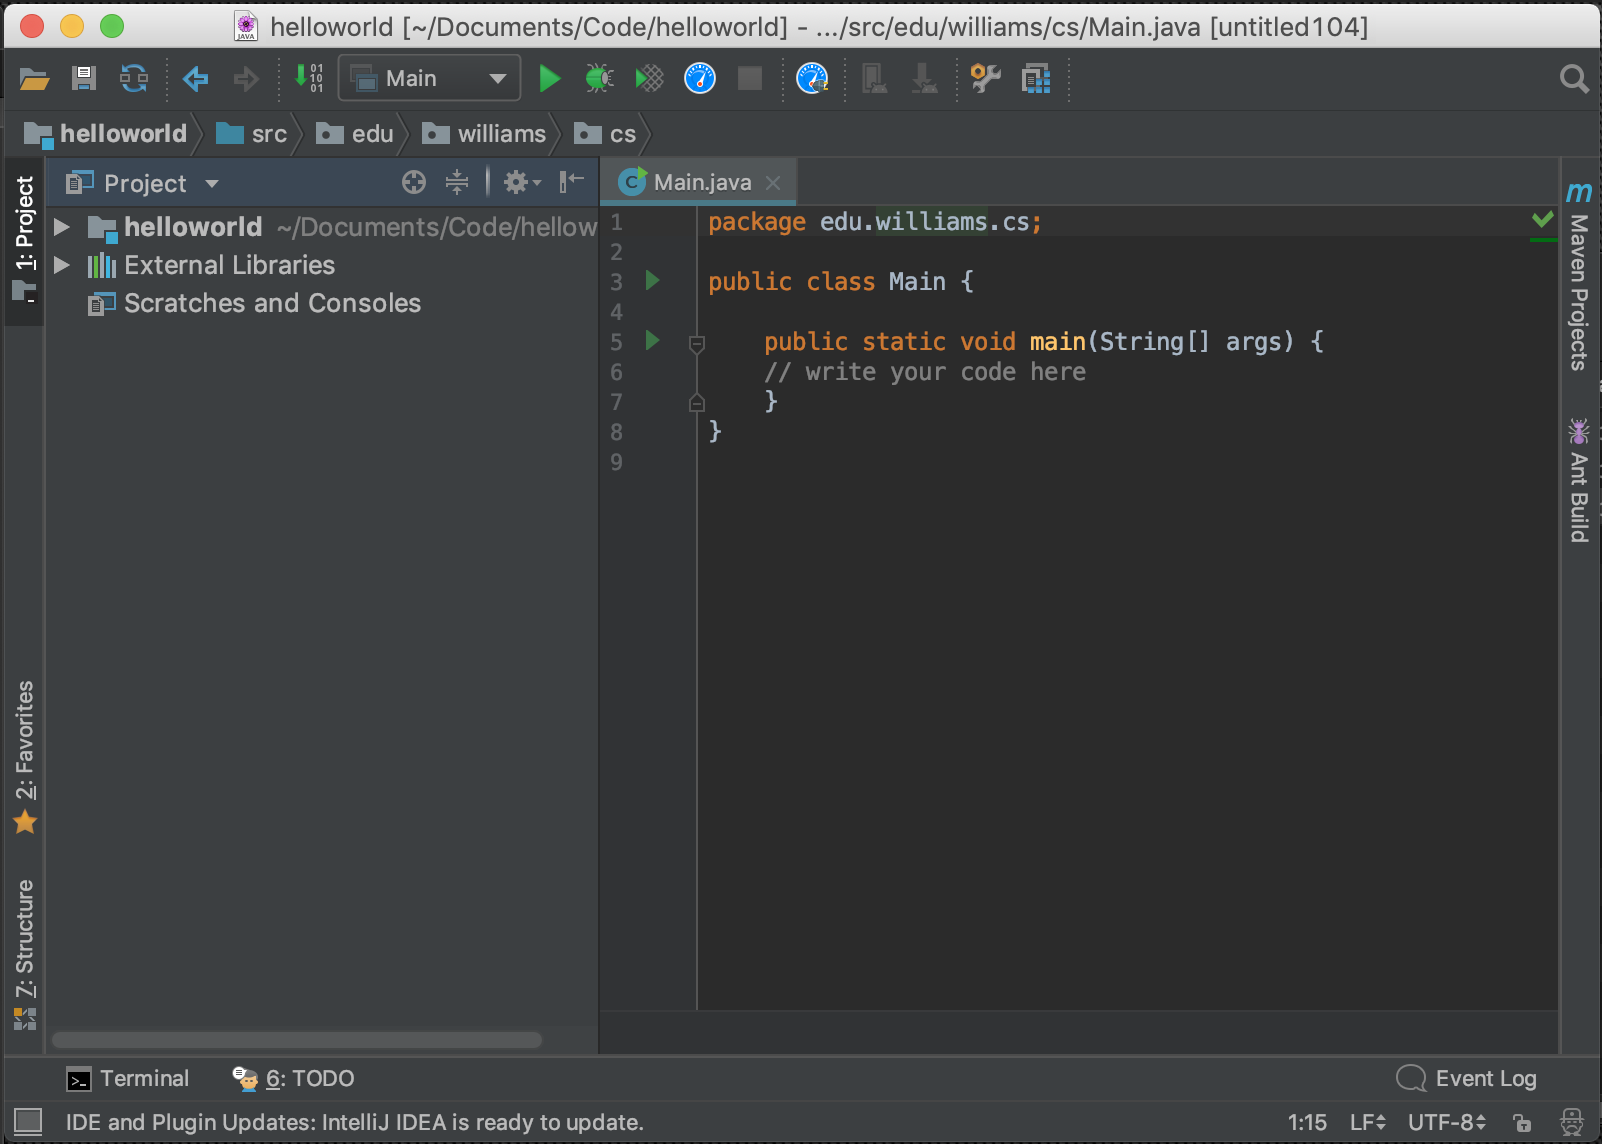
The window is broken into four main regions: a 1) project drawer, a 2) code window, a 3) toolbar, and 4) a status bar.
Clicking on the little triangles in the project drawer will reveal the files in your project. When you create new source code files, you should put them in the src/edu.williams.cs folder.
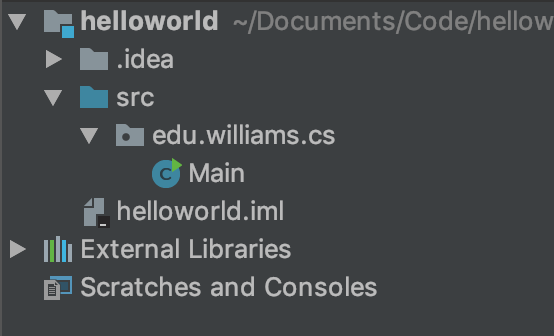
The helloworld.iml file and the .idea folder are for IDEA’s own bookkeeping purposes. If you are working on a project with a partner, and you are wondering whether you should add your <project>.iml and .idea files to git, How to manage projects under Version Control Systems. Note that the link has a helpful .gitignore file that you can use. If you don’t want to think about any of this right now, just be sure to only add your .java files to your git project.
Running your project
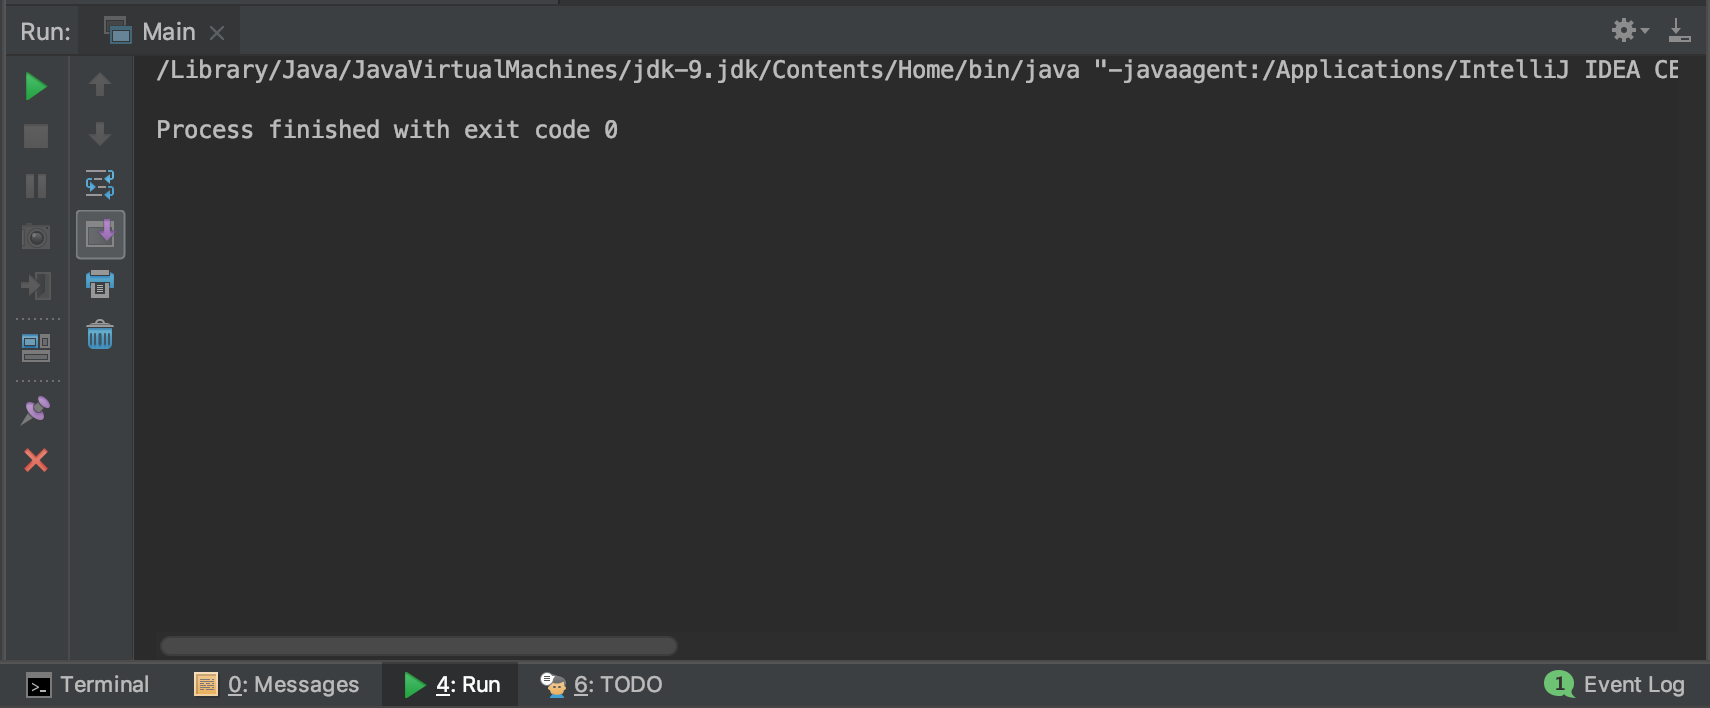
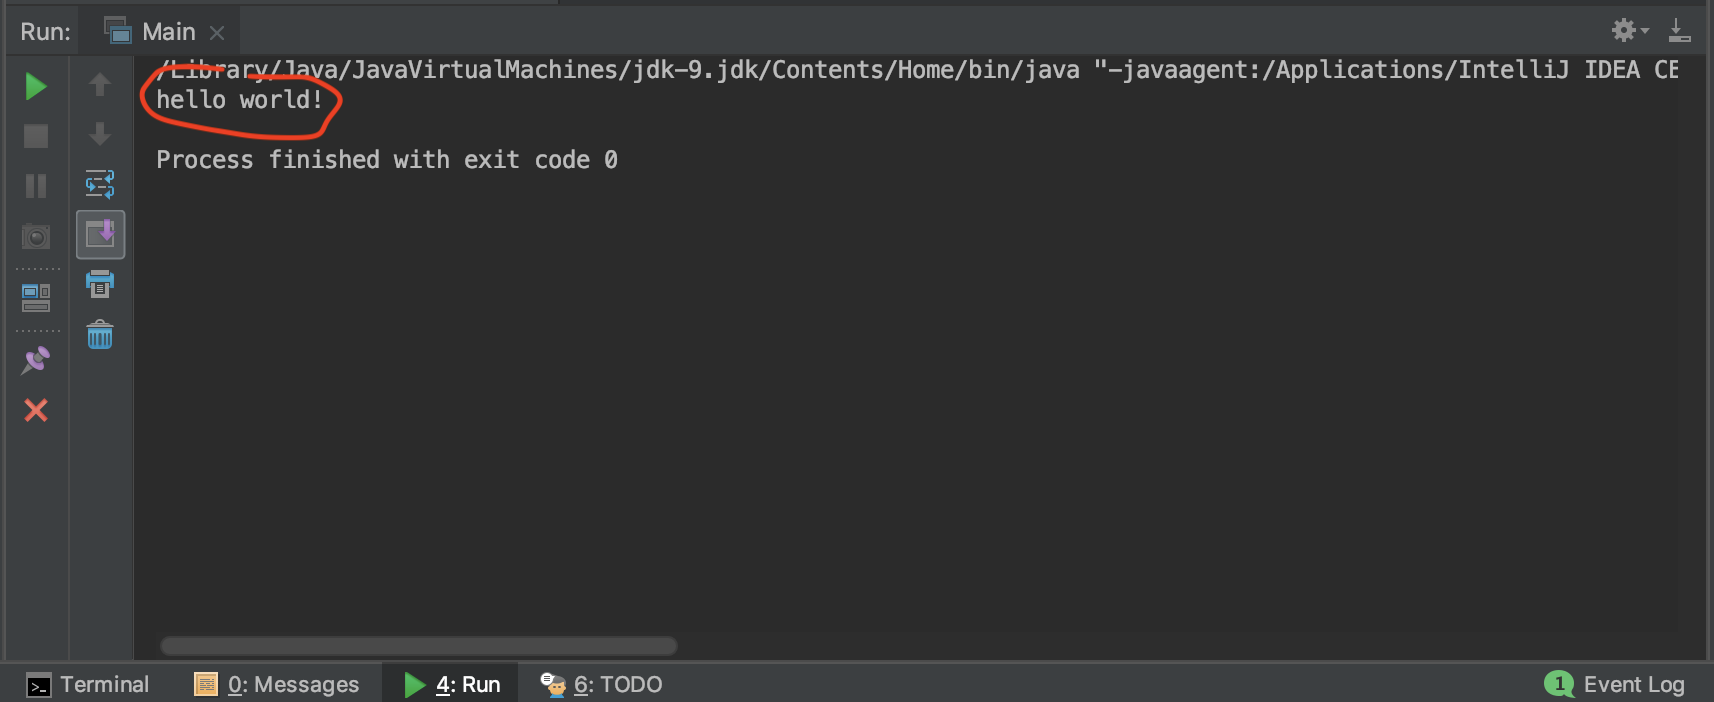
To run a project, click the  button on the toolbar. Since this is a console application, you will see the output in a pane that pops open below:
Since this project has an empty main method at the moment, it does nothing. Change the main method so that it looks like the following:
public static void main(String[] args) {
    System.out.println("hello world!");
}
And click the button again. You should now see:
Since this is a command-line program, in principle, it should be possible to supply command-line arguments. You can supply command-line arguments using an IDEA “Run configuration.” Change your main method to the following:
public static void main(String[] args) {
    System.out.println(args[0]);
}
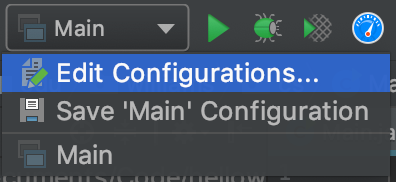
Now click on the run configuration dropdown menu (it should be titled Main) and select “Edit Configurations…”
The following screen is a configuration that lets you set a variety of startup options for your program. There’s a lot here, so we will focus on just providing arguments.
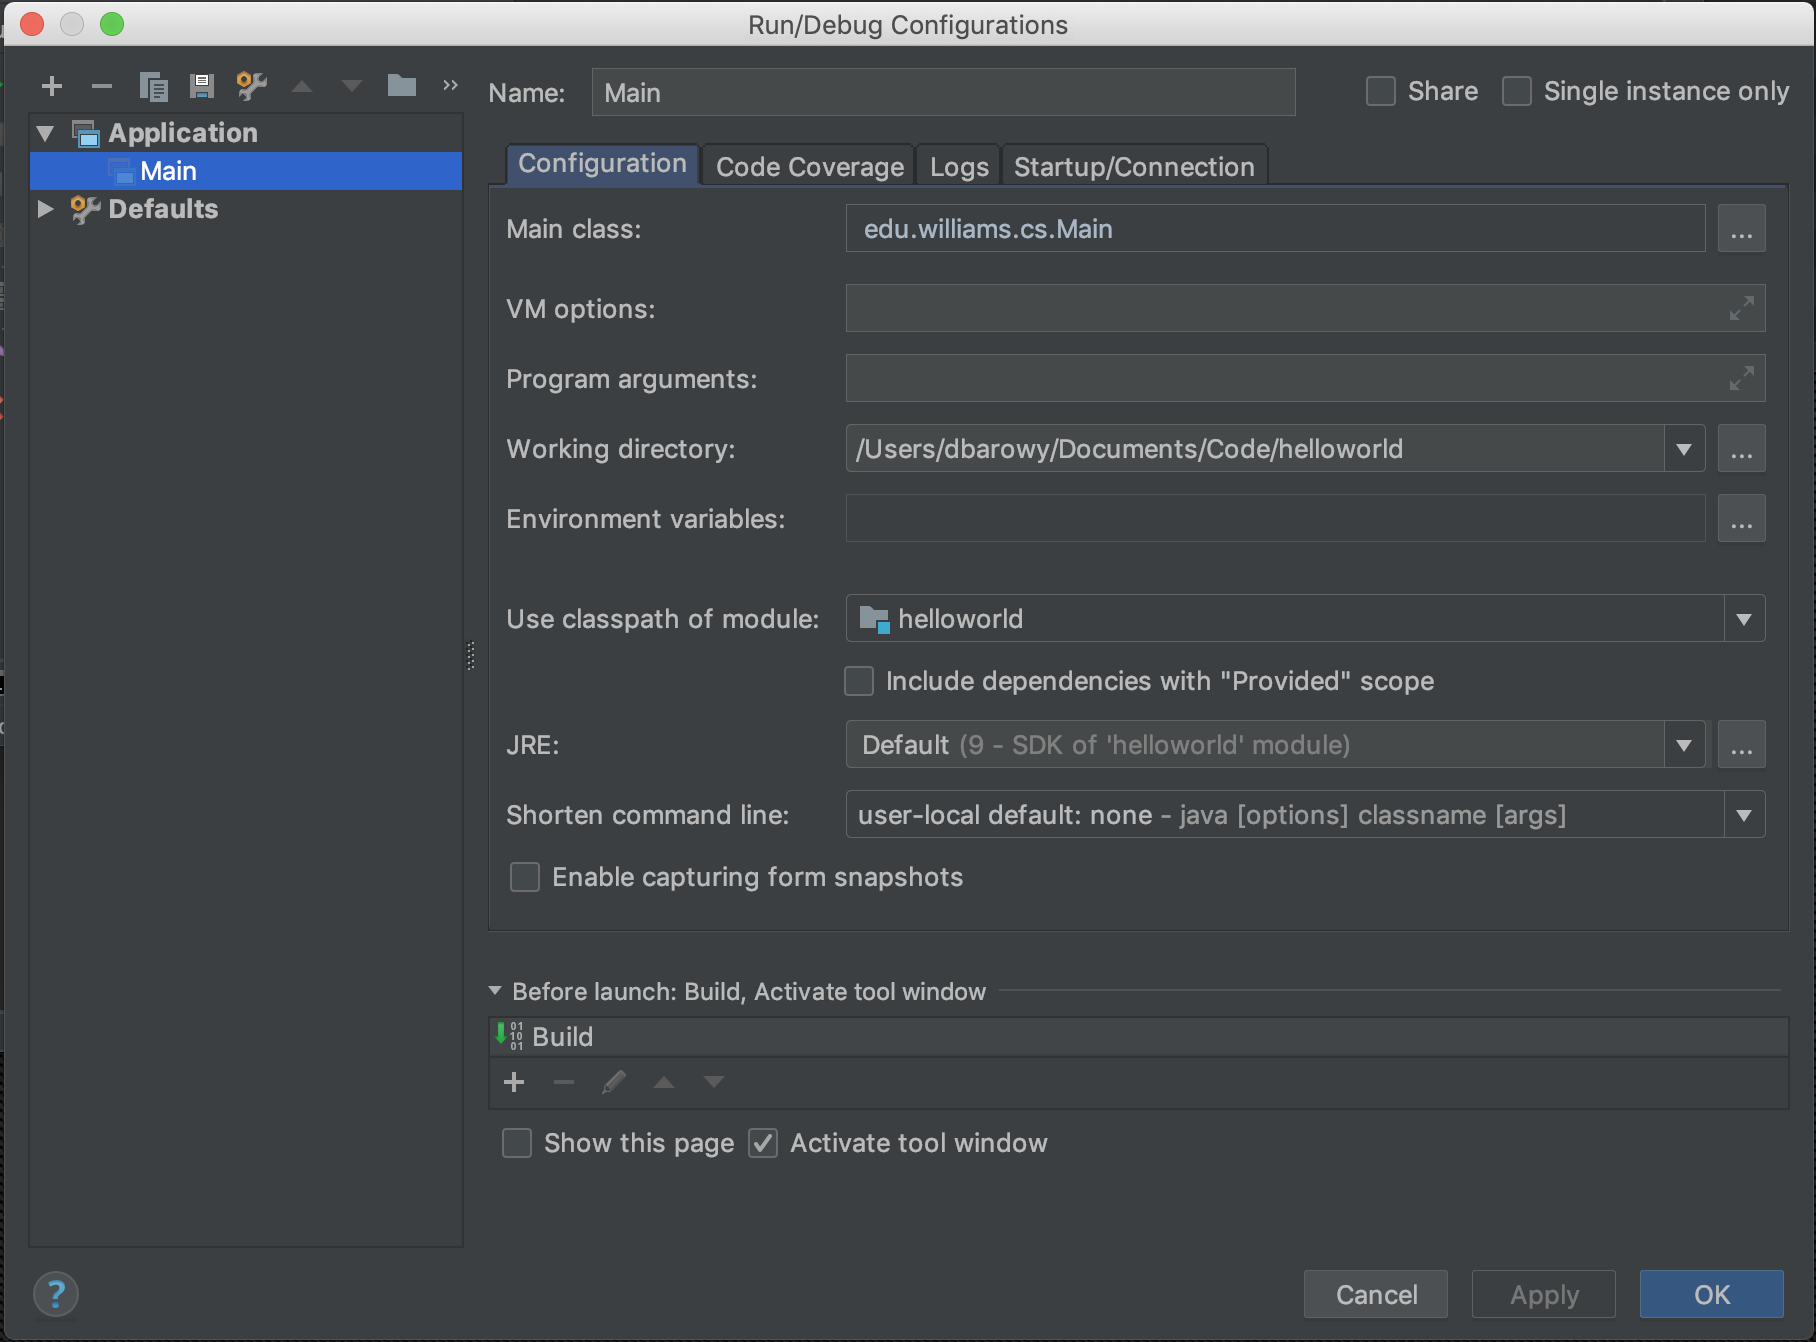
Type hello into the field labeled Program arguments.

Click “OK” to close the window.
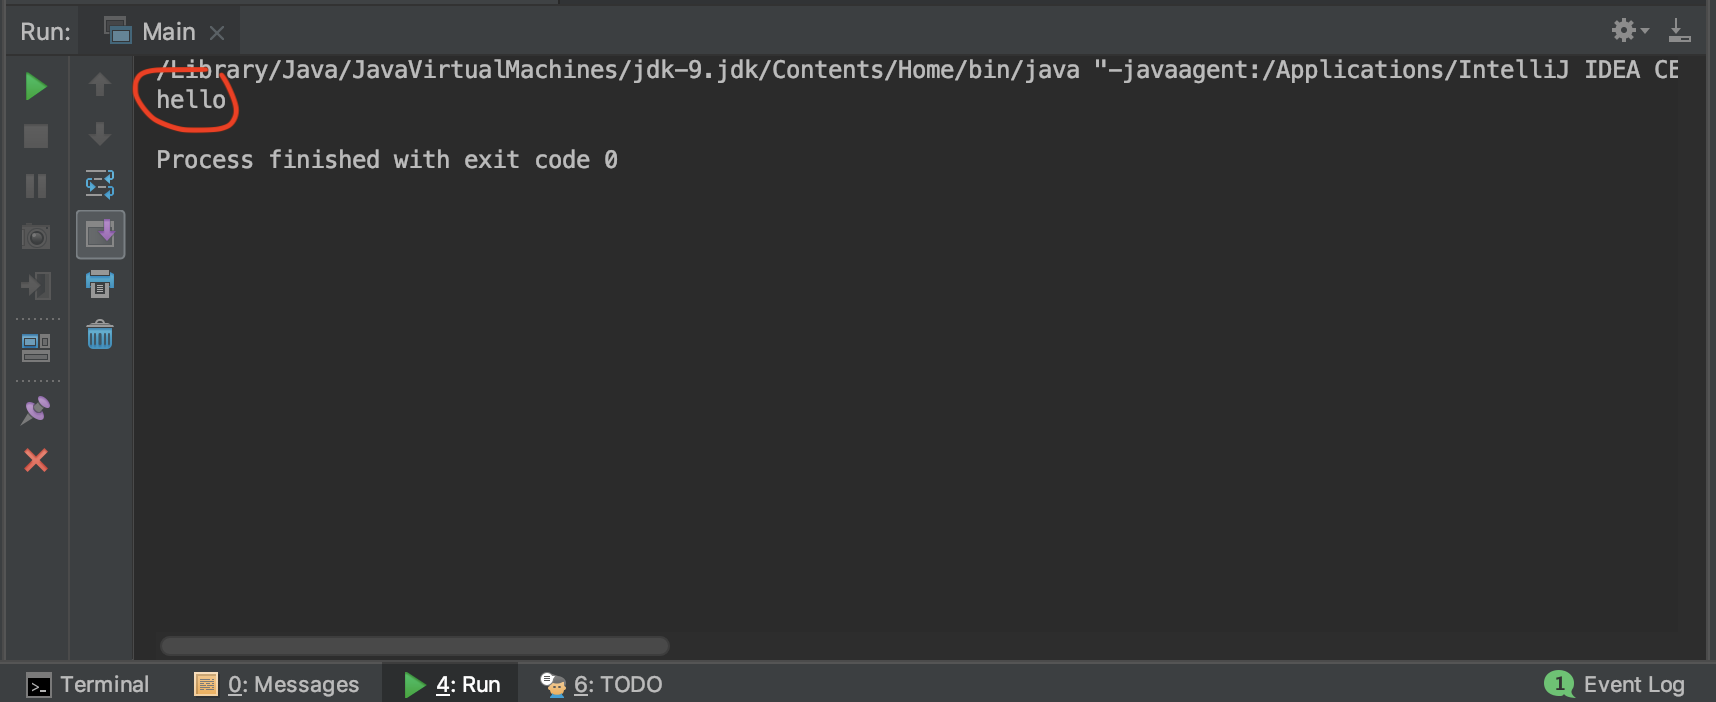
Finally, click the button again. You should see “hello” appear in your output where “hello world” appeared before.
Adding a library to your project
Nearly all of the labs you work on in this class utilize the bailey.jar library from the Java Structures book. Let’s change our main method to utilize one of the libraries:
public static void main(String[] args) {
    Vector<Integer> v = new Vector<Integer>();
    for (int i = 0; i < 10; i++) {
        v.add(i);
    }

    System.out.println(v);
}
and don’t forget to add:
import structure5.*;
at the top of your file, under the line package edu.williams.cs;
The moment you add this code, IDEA will highlight a number of things in bright, angry red. IntelliJ does this to let you know that there are problems with your code.
The first thing to notice is the sidebar with the red exclamation point  over it. If you look carefully at this sidebar, you will notice horizontal red lines. These lines indicate locations of errors in your program. If you mouseover one, IDEA will give you a brief summary of the problem; if you click on one, your code window will move to that location.
The second thing to notice is that certain text is highlighted in red. Red highlights indicate problematic areas.
Finally, in your project drawer, the names of files with errors will have a red squiggle under them.
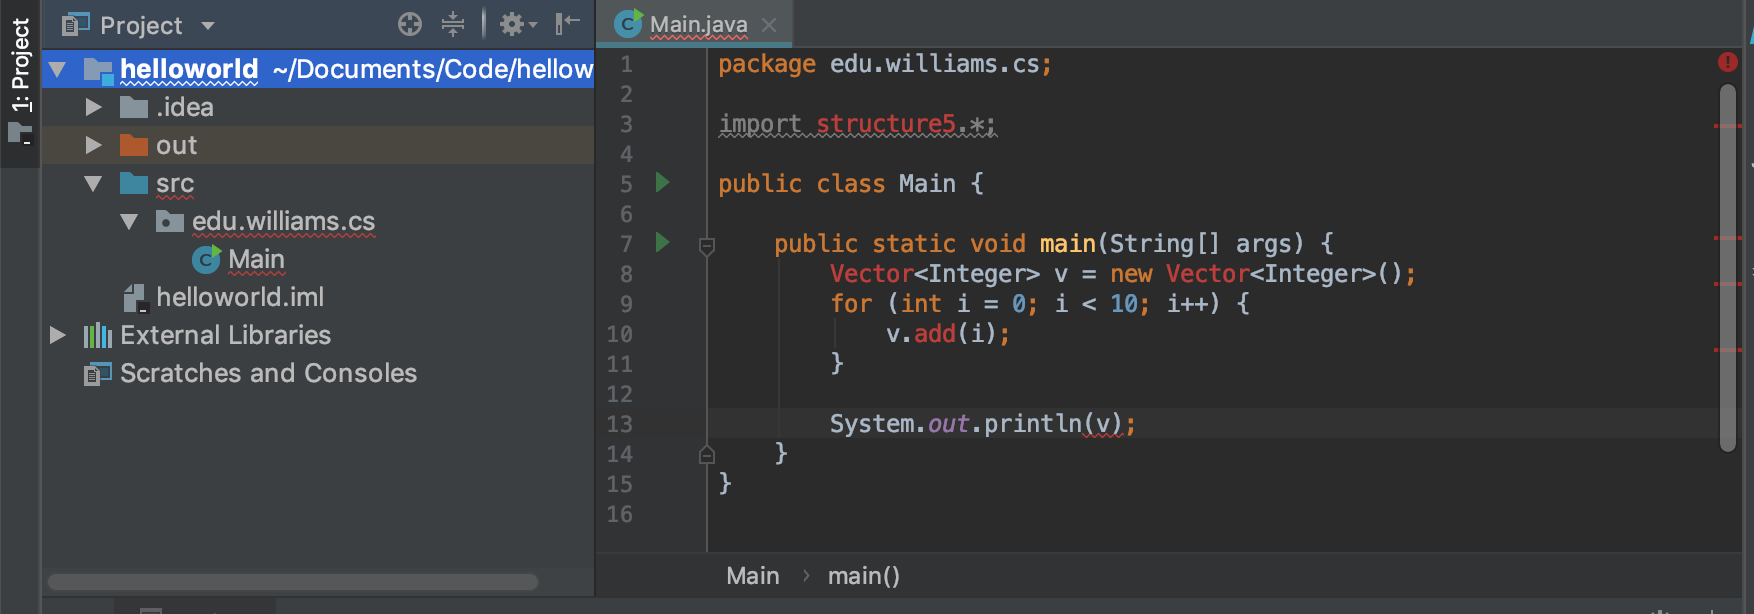
All of these problems happen to be caused by the same thing: IDEA does not know what a Vector<Integer> is. Let’s tell it.
First, click on the File menu and select Project Structure....
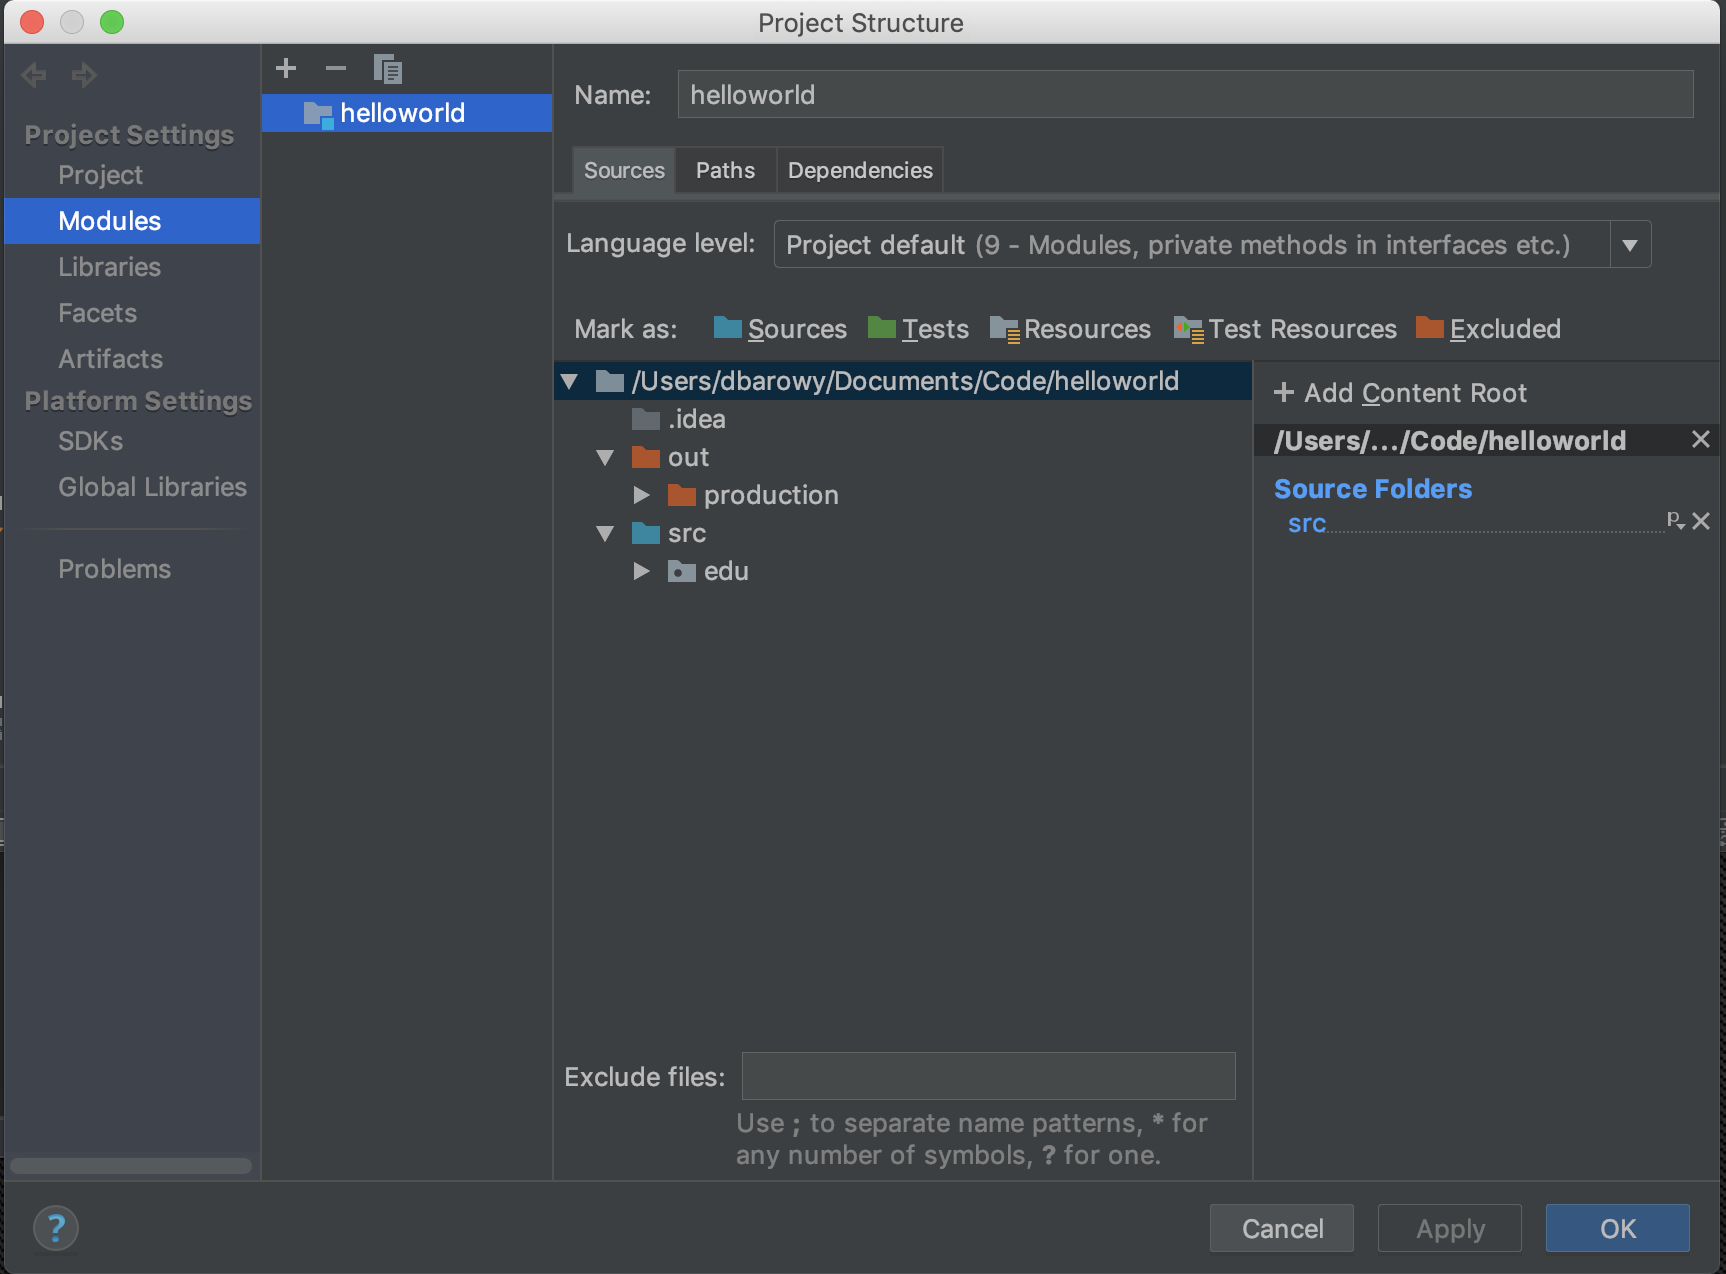
Again, there are a lot of options here, so let’s focus on adding a library. Click on the “Libraries” option in the pane on the left side.
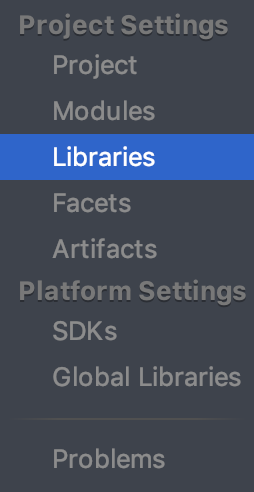
Click the  button at the top of the middle pane and select “Java.”
You will be asked to locate your JAR file. Here’s the location of the bailey.jar file on my own computer.
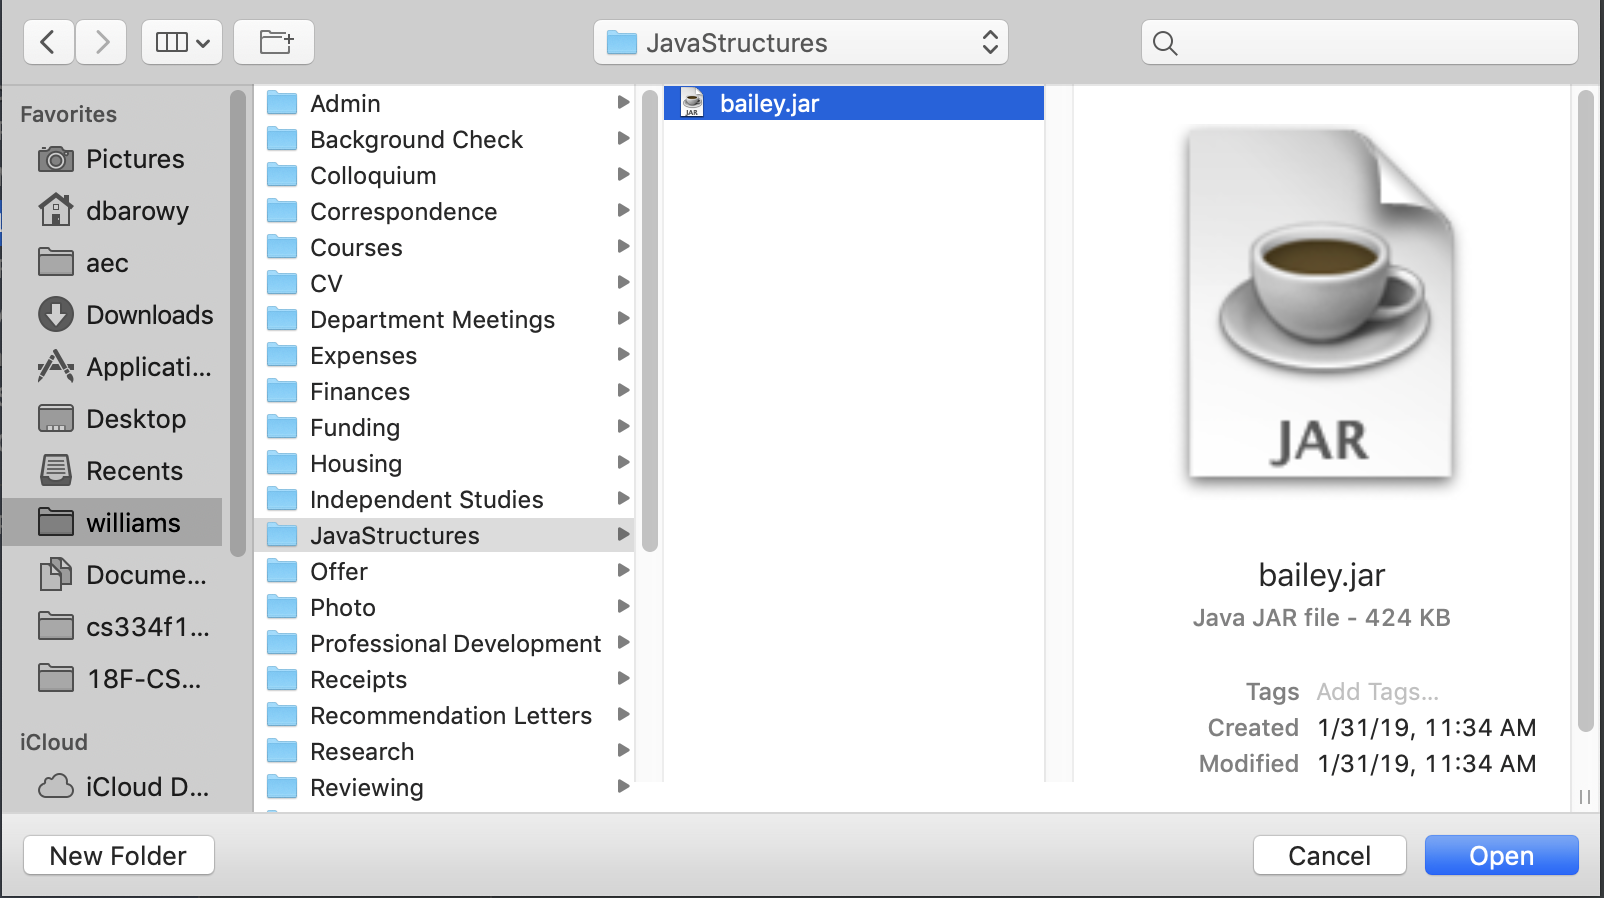
Once you’ve found and selected your bailey.jar, click “Open.” I can’t tell you where to look because this is presumably a file that you downloaded and stored on your machine. If you don’t have it, download it again.
IDEA will ask you to confirm that you want to add bailey to your project:
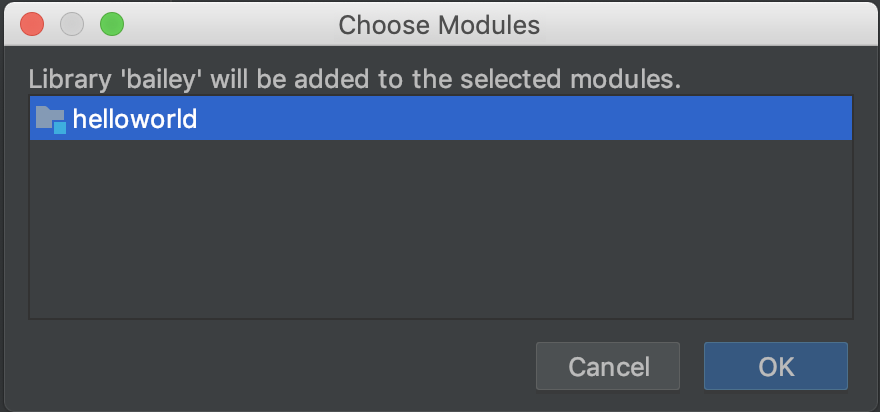
Click “OK” to confirm and then “OK” in the “Project Structure” window to close it.
Your editor should now look a lot less angry. In fact, you should now be able to run this program without complaints from IDEA.
Finding bugs with the breakpoint debugger
Let’s insert a bug into our code. Change your main method to:
public static void main(String[] args) {
    Vector<Integer> v = new Vector<Integer>();
    for (int i = 0; i < 10; i++) {
        v.add(i);
    }

    for (int i = 0; i < 10; i++) {
        System.out.println(v.get(i+1));
    }
}
See our bug? I changed System.out.println(v) to System.out.println(v.get(i+1)) which will cause an ArrayIndexOutOfBoundsException because index 10 is beyond the end of our Vector. Running it prints the following in the output:
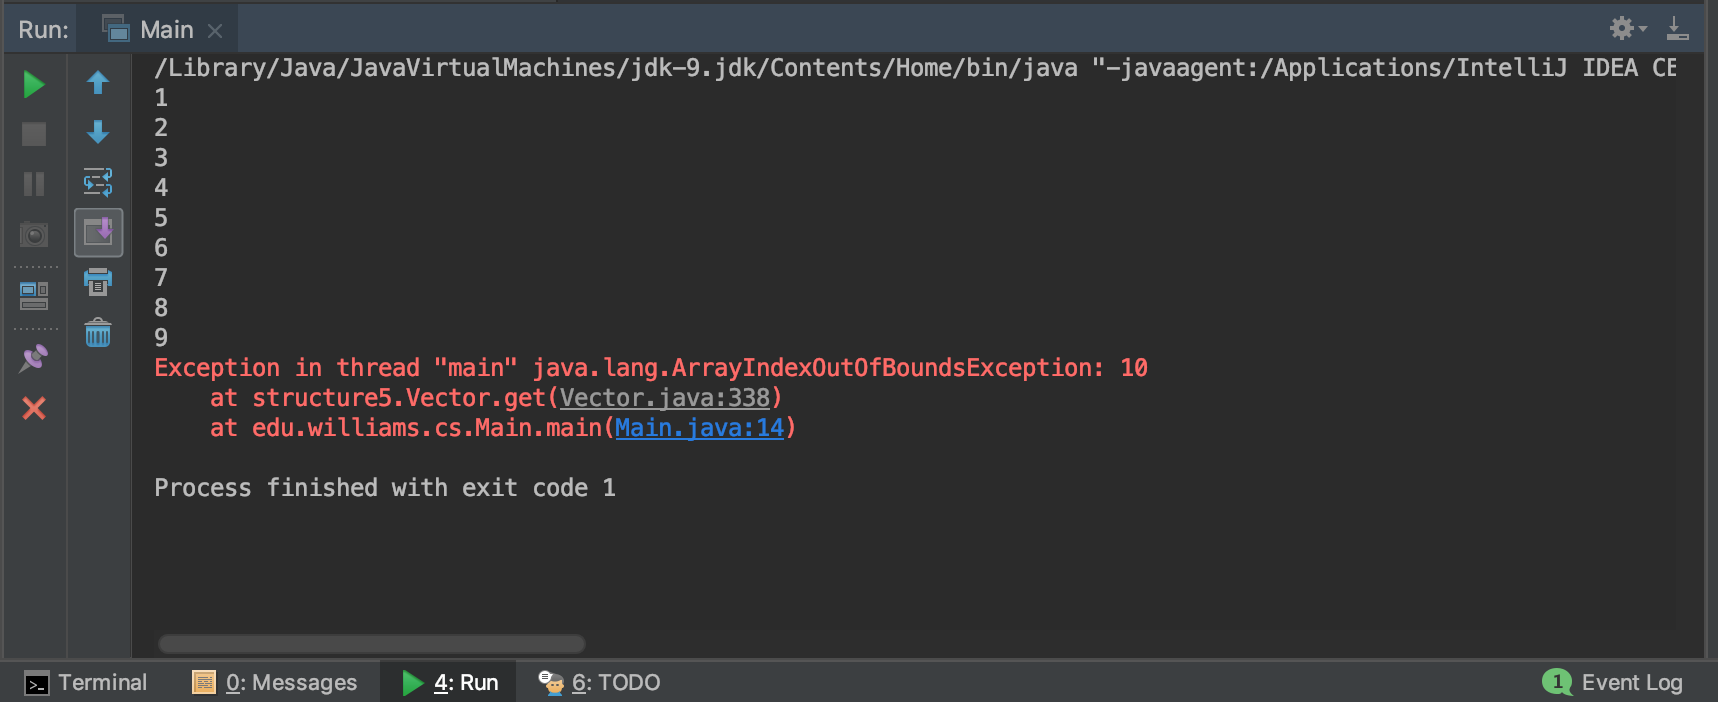
Notice that the exception is highlighted in angry red. IDEA generally reserves angry red for something that you really need to fix right away.
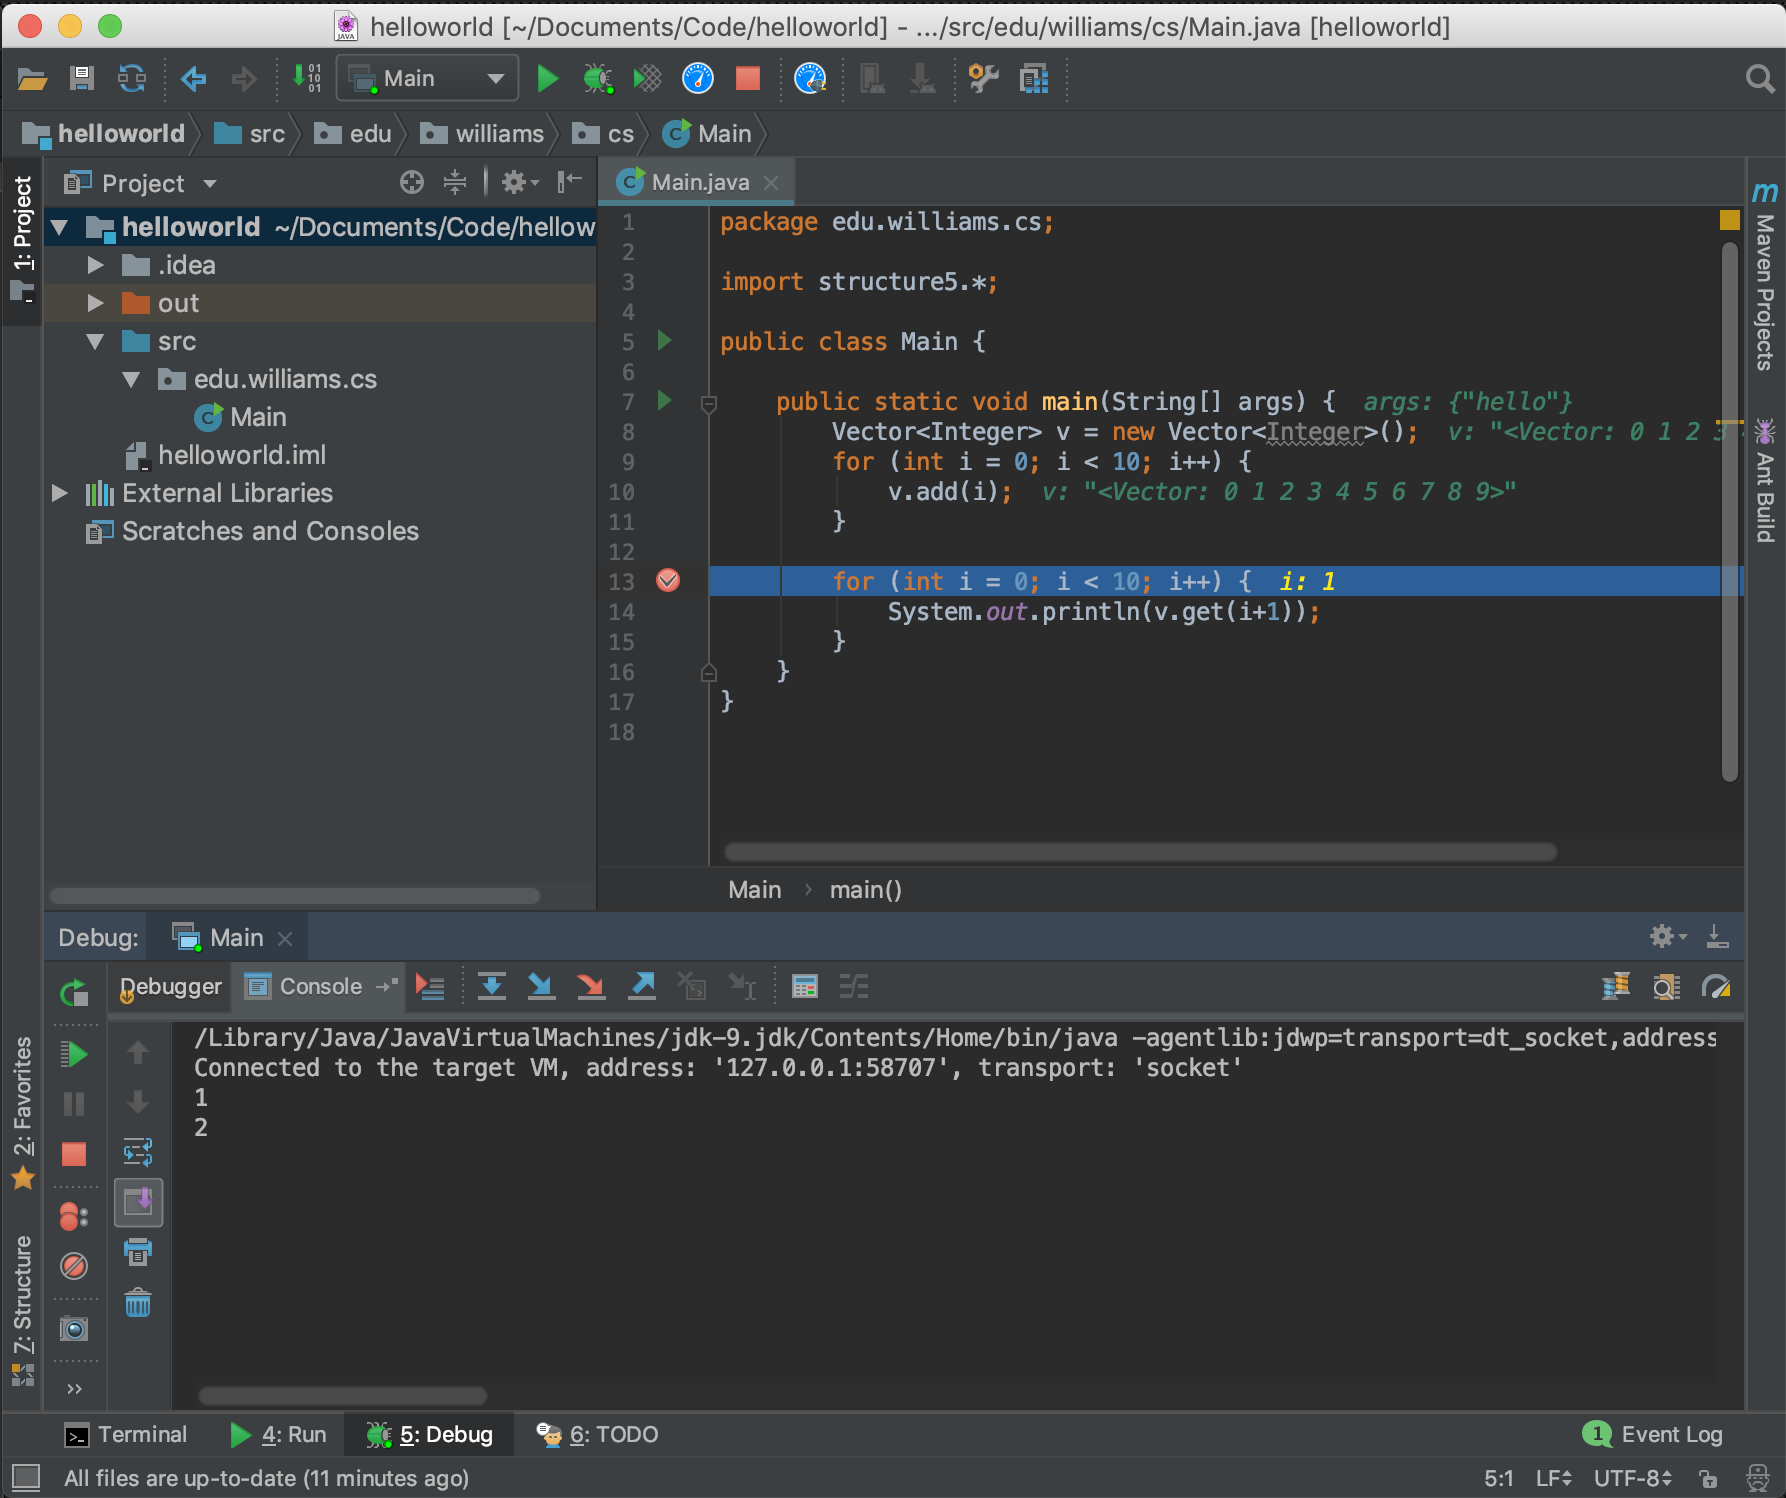
Let’s suppose for a moment that the bug is not obvious and that you need to run the program in order to find it. Furthermore, let’s suppose that you know that the problem isn’t when we assign values to the Vector but when we try to retrieve them. Click on the empty space to the right of line 13 so that a little red dot appears in the margin.

The little red dot is a breakpoint. It means that when you run your program in debug mode, it will stop and show you the state of the program. Note that you can clear a breakpoint by clicking on the red dot (don’t do that just yet). Now click on the debug button  in the toolbar.
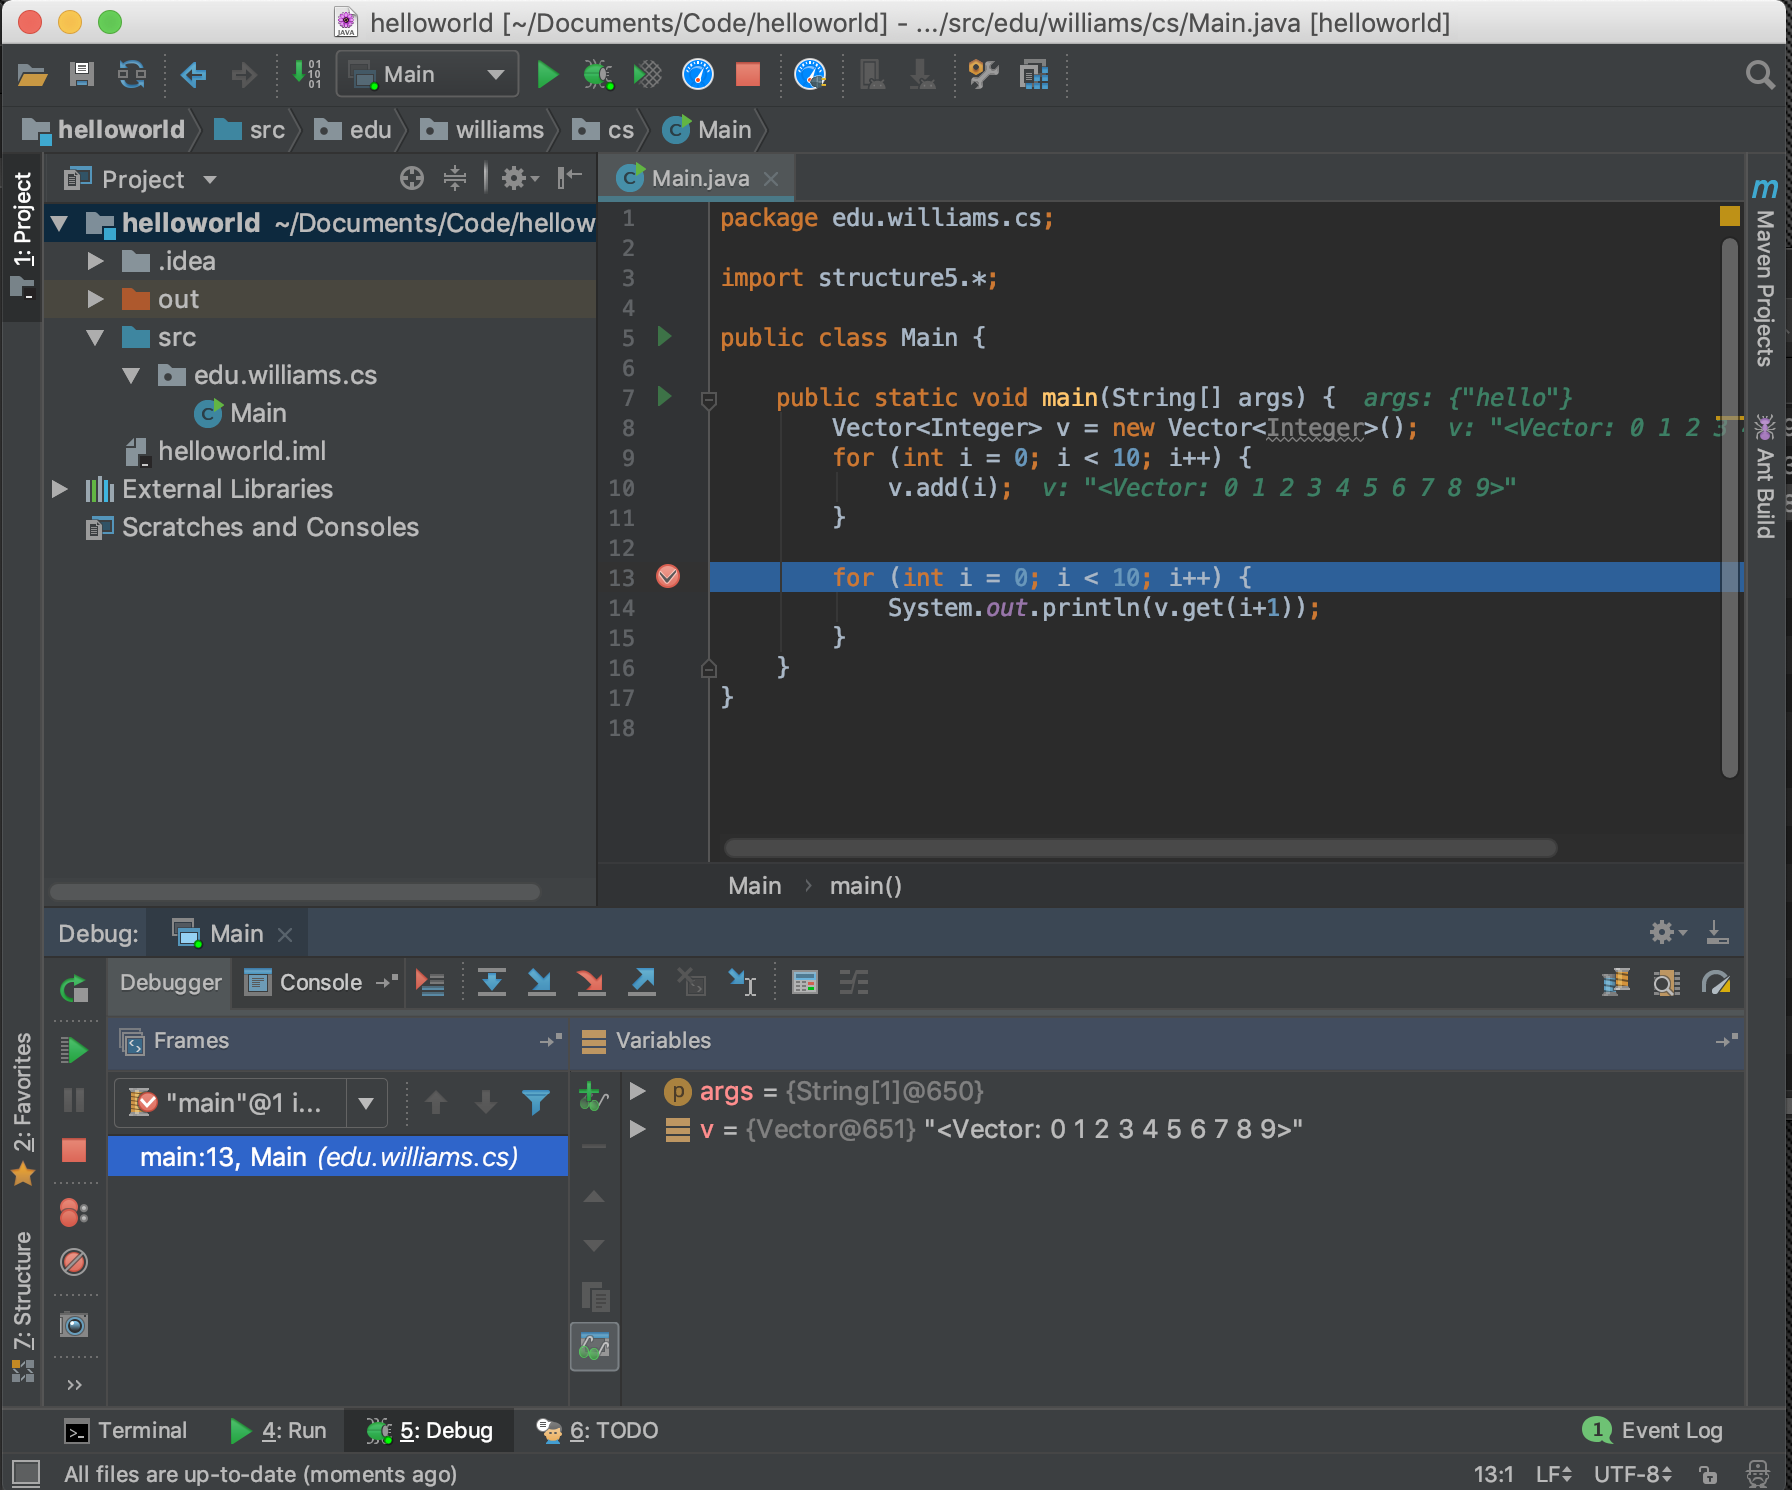
First, note that a little checkmark has appeared inside the red dot:  This means that your program is broken, or paused, at that line.
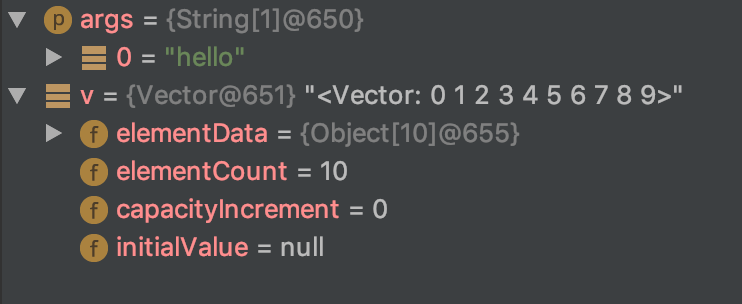
Also, you should see the output window below now split into two parts. On the left is IDEA’s view of the call stack (yes, this is the same call stack that we’ve been talking about in class). On the right is are the set of local variables stored in the currently-selected stack frame. In this case, we are looking at the main stack frame, which stores two variables: a reference to the args array and a reference to the Vector v.
You can click on the little triangles and expose the internal state of any of the objects referred to by the active stack frame. For example, here’s what’s inside the args and v objects. Remember that we did not remove hello from the command-line arguments so it’s still there!
Let’s tell the debugger to execute the next line of code. Click the “step over” button  , which you will find on the debugger toolbar just above the variables window. The step over button advances your program one instruction. Try clicking it a few times. You should note that after your program finishes executing the loop body in a
 for loop, the i variable will be incremented.
Every time your program executes a System.out.println statement, something is printed to the console. Where does that go? Click on the “Console” tab which is just above the stack frames. You should see the output of your program as it has executed so far here.
If you continue to click the step over button, you should observe that executing a System.out.println statement causes output to appear in the Console window.
Now, keep clicking “step over” until your program fails. You should now see the exeption appear in the Console.
Conditional breakpoints
OK, so it is clear that the problem appears around the time that i == 9. Is there a way to “fast forward” to the point in the program when i == 9? Yes!
Delselect the breakpoint you set before by clicking on it. It should go away. Now click in the space next to line 14, which will set a new breakpoint, then right-click on the red breakpoint dot that you set before. If your computer (i.e., a Mac) does not have a right mouse button, hold the Option key while you click. The following menu should appear:
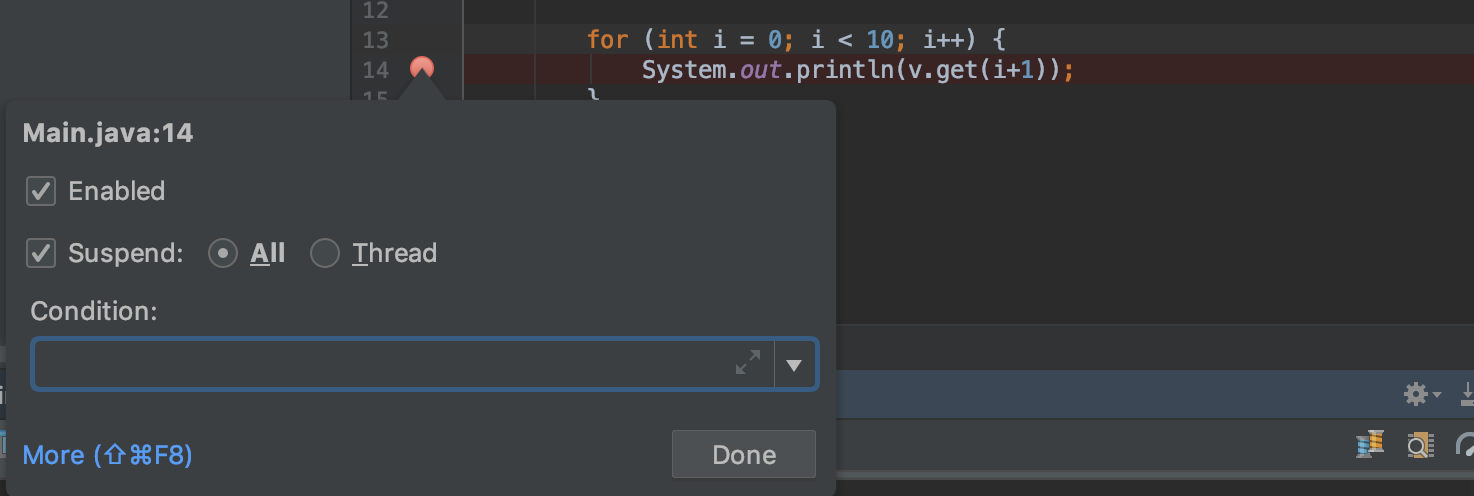
In the “Condition” field, type: i == 9 and click “Done”.

Now run the program in debug mode .
You should notice that IDEA breaks on line 14 when i == 9. Clicking the step over button should reveal that the for loop then increments i == 10 and then the program fails.
Other debugging notes
The “resume program” button  will skip over the current breakpoint and break at the next one, or if there aren’t any more, will execute until the program finished.
The “stop” button  immediately terminates the program without waiting until the normal end. If you find a bug that you want to fix while debugging, you should press this button before making changes.
The “view breakpoints”  will show you all of the breakpoints in your program, even if they are in different source code files.
Adding files to your project
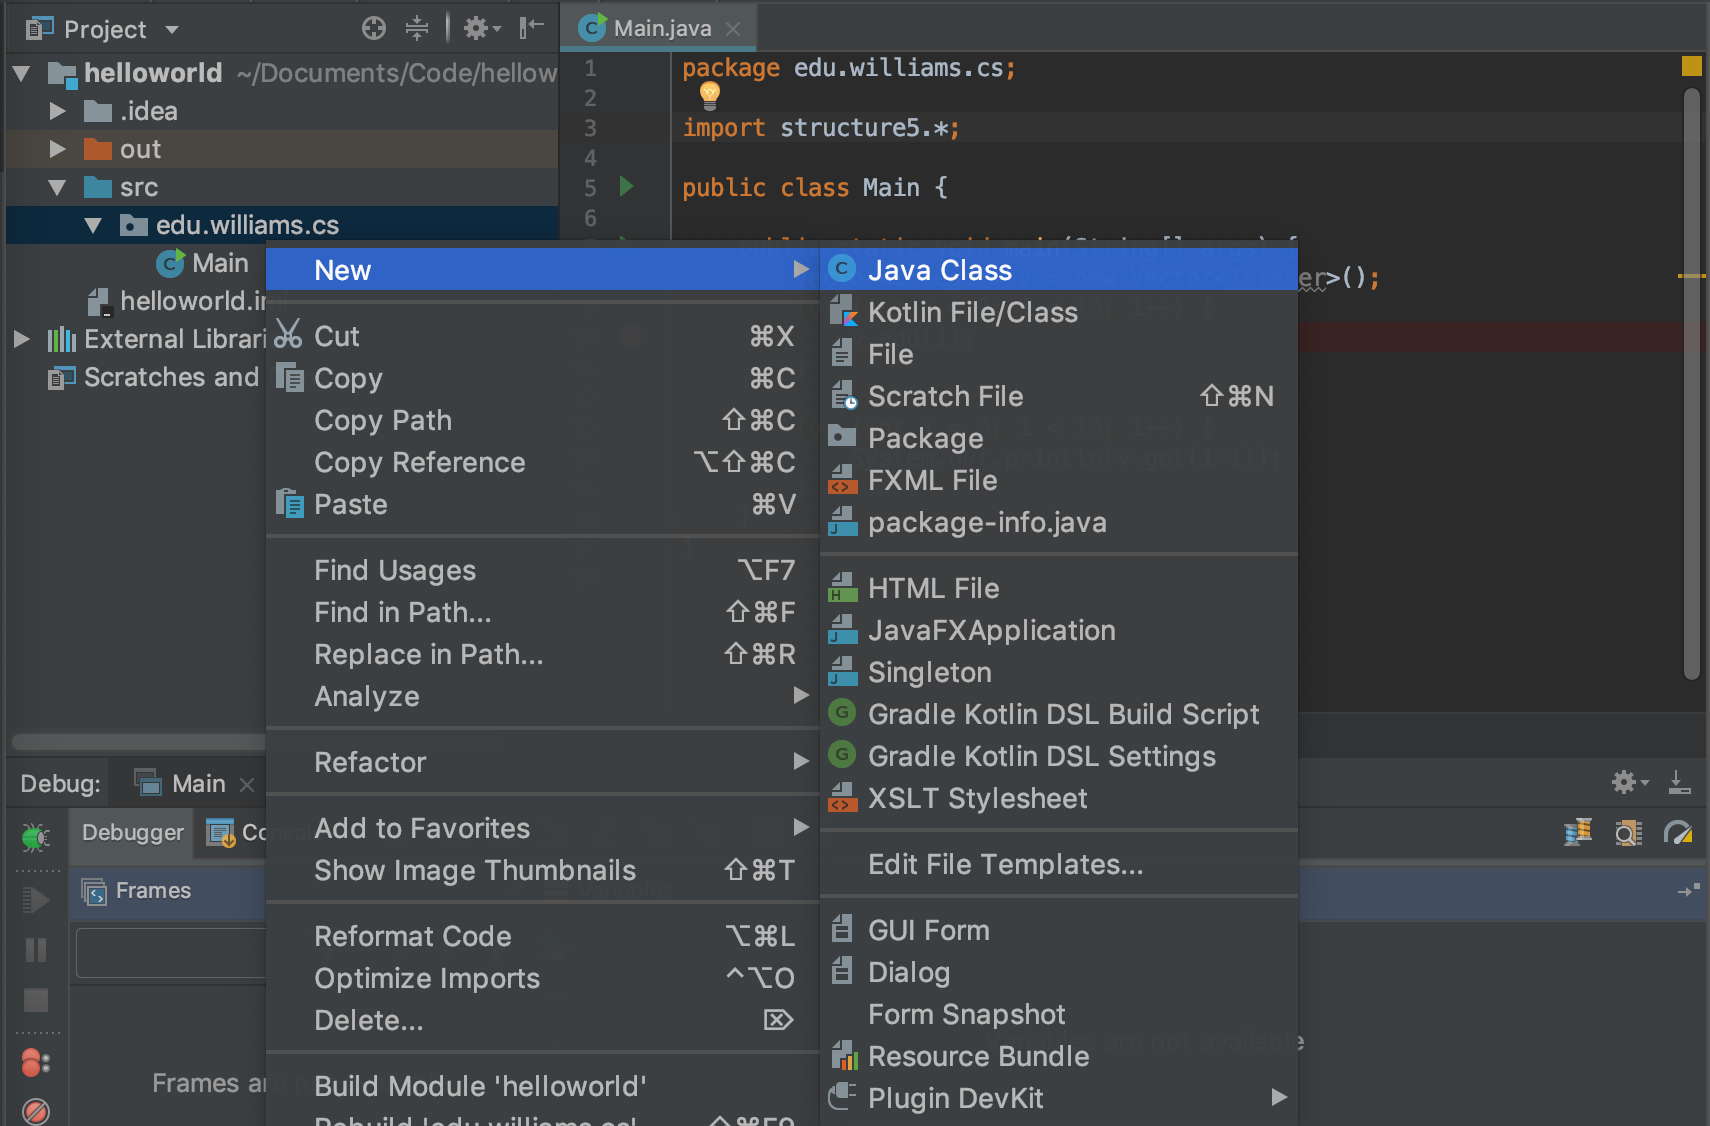
You can add as many files as you want to your project. Let’s add a new Java file called Foo.java.
Right-click (or Option click) on the edu.williams.cs folder in your project drawer and select “Java Class.”
Type in the name of the class, in this case Foo.
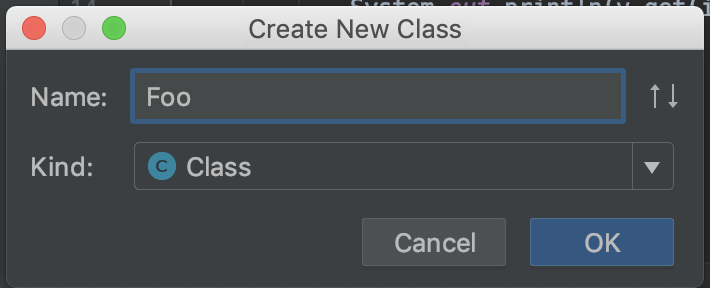
Click “OK”. You should now see a new class called Foo in your editor, and a new entry for Foo.java will appear in your project drawer.
Adding a project from Github and other tutorials
IDEA has many, many additional features. Feel free to explore them. JetBrains, the company that makes IDEA, also provides extensive documentation and how-to videos.
In particular, you may be interested in watching the “Checking out from Version Control” video to see how to populate a project from Github.
Have a look and good luck!